Table of Contents
1. Objective
This document explains how to:
- Create a custom workspace.
- Configure the workspace using UI Builder.
- Create workspace pages.
- Add components such as lists, headings, buttons, and data visualizations.
- Configure navigation.
- Make the custom workspace visible under the Workspaces section in ServiceNow.
- Test the workspace from an end-user perspective.
2. Prerequisites
Before starting, make sure you have:
- ServiceNow instance
- Access to UI Builder
- Appropriate admin/developer permissions
- A scope/application where the workspace will be created
- Tables that you want to display in the workspace
- Roles required for accessing the workspace
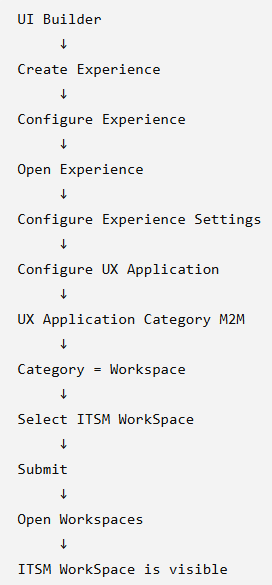
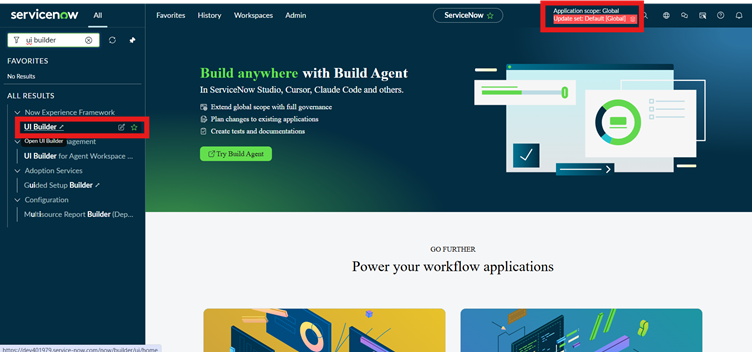
Step 1: Navigate to UI builder and scope should be global.
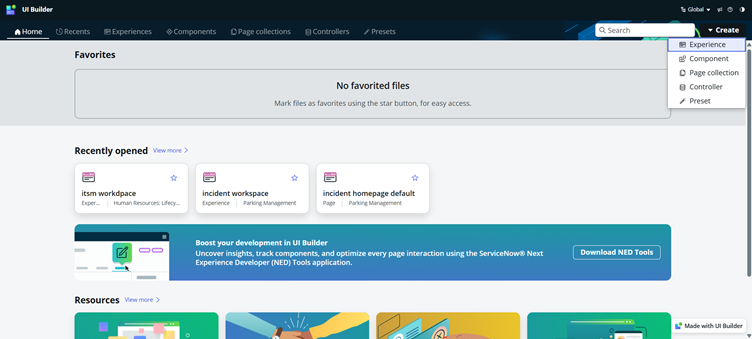
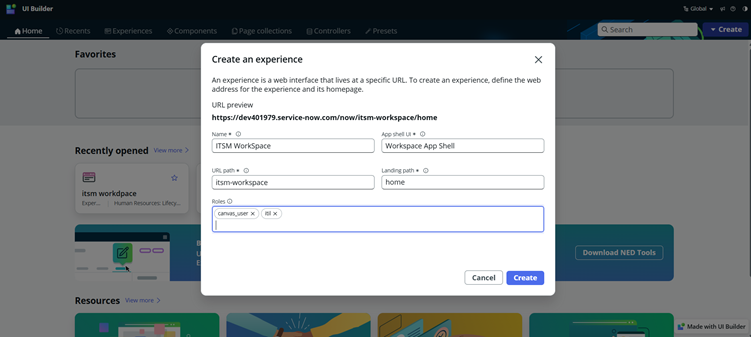
Step 2: In UI Builder, click Create in the top-right corner and select Experience.
An Experience represents the user-facing application/interface.
Select the option to create a new experience.
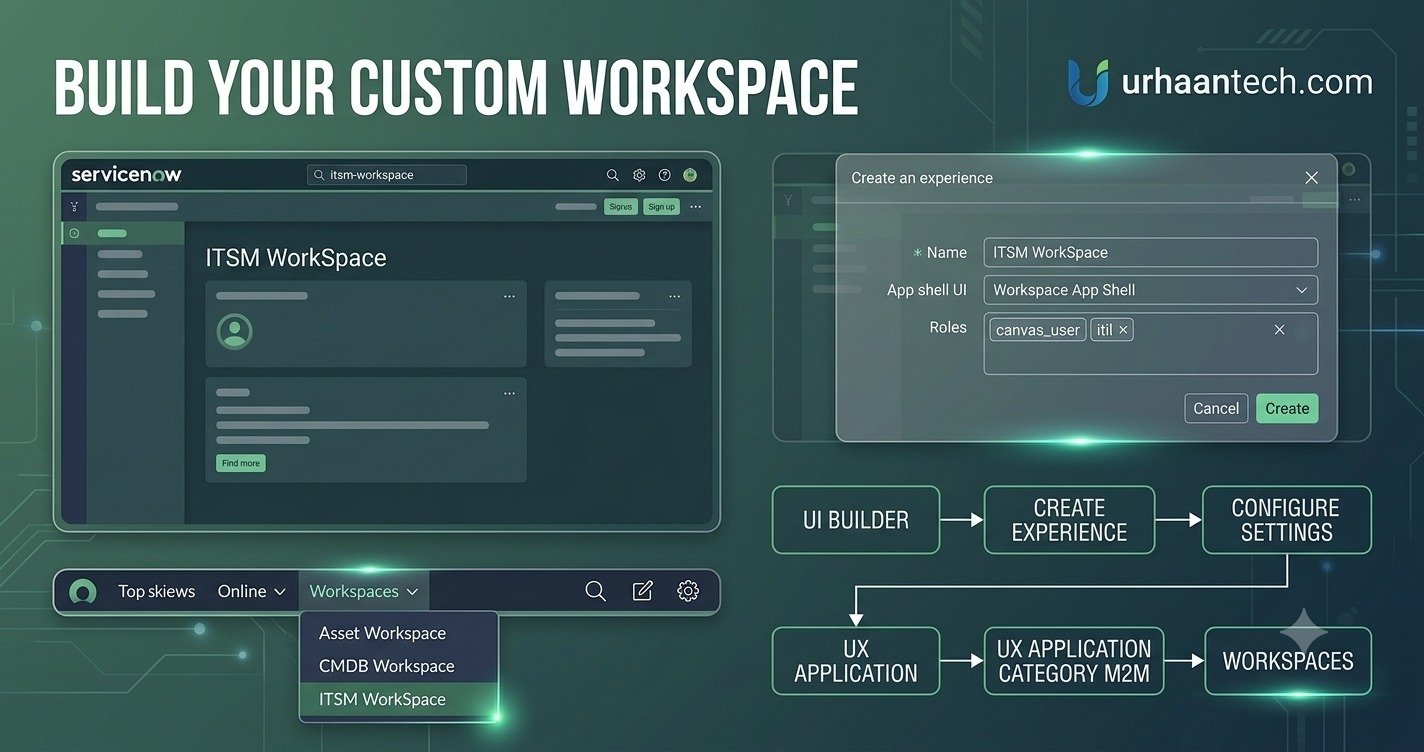
Step 3: In the Create an experience window, enter the required information.
Name
Enter:
ITSM WorkSpace
App shell UI
Select:
Workspace App Shell
URL path
Enter:
itsm-workspace
Roles
Add the roles required to access the workspace.
In your example, the roles are:
canvas_user
itil
The URL will be generated based on the URL path and landing path.
After entering the required details, click:
Create
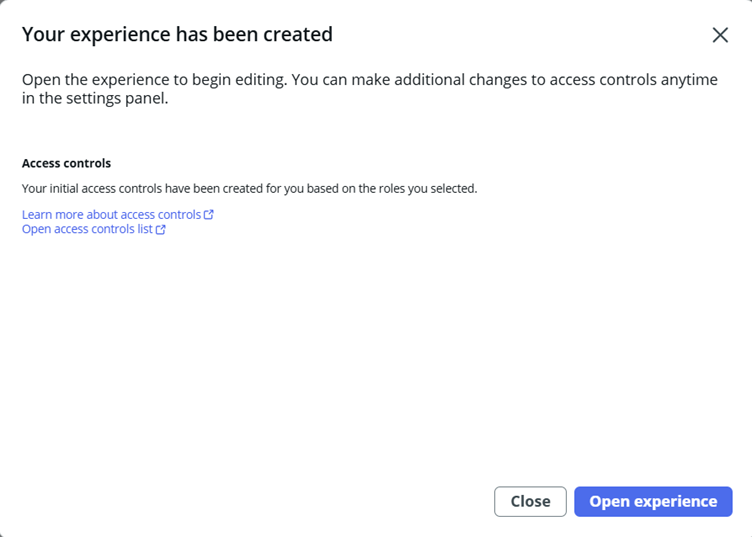
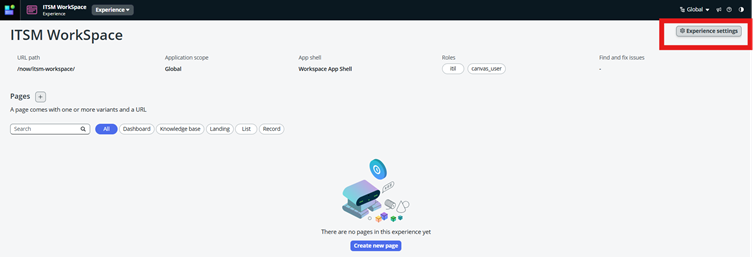
Step 4: After opening the experience, you will see the Experience settings option.
Click:
Experience settings
The Experience Settings page allows you to configure the workspace.
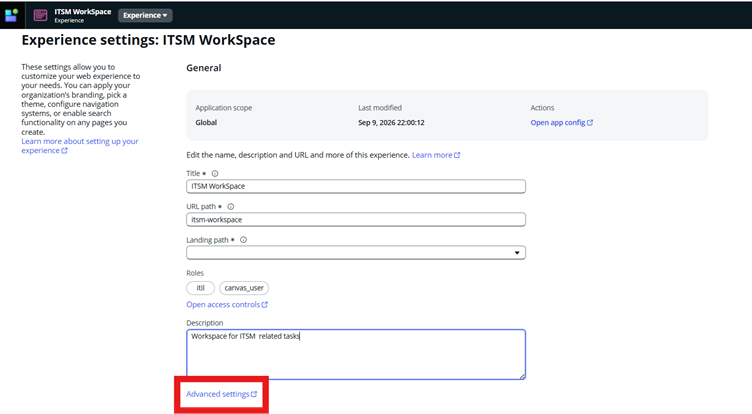
Step 5: Configure the following:
Title
ITSM WorkSpace
URL path
itsm-workspace
Landing path
Select the appropriate landing page.
Roles
Verify that the required roles are present:
itil
canvas_user
Description
Enter:
Workspace for ITSM related tasks
Step 6: Open the UX Application Record
After configuring the experience, open the corresponding UX Application record.
The UX Application record contains important workspace information such as:
- Title
- Application
- Page
- App Shell UI
- URL path
- Active status
- Admin panel
- Parent App
In your example:
Title
ITSM WorkSpace
Application
Global
App Shell UI
Workspace App Shell
URL path
itsm-workspace
Make sure:
Active is checked.
You can also use:
Open in UI Builder
to return to the workspace configuration.
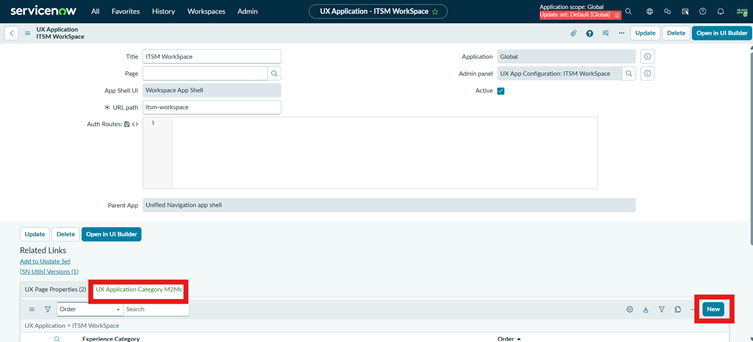
Step 7: Configure UX Application Category
This is the important step that makes your custom workspace appear in the Workspaces section.
On the UX Application record, go to the related list:
UX Application Category M2Ms
Step 8: Create UX Application Category M2M Record
A new UX Application Category M2M record will open.
Configure the fields as follows:
Experience Category
Select:
Workspace
UX Application
Select:
ITSM WorkSpace
Application
It should be:
Global

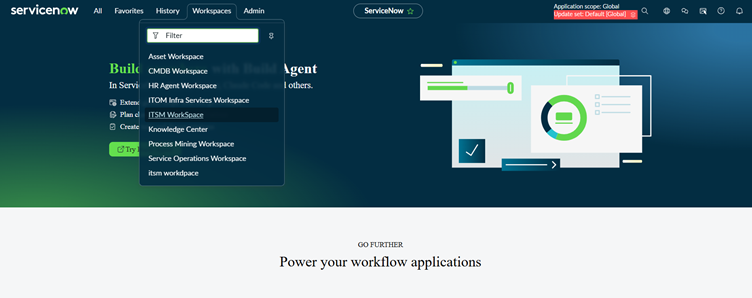
Step 9: Verify Workspace Visibility
After submitting the UX Application Category M2M record, navigate to:
Workspaces
from the top navigation.
Open the Workspaces menu.
You should now see your custom workspace listed along with the other available workspaces.
Full Process Flow: