
Table of Contents
Understanding the Default Time Zone Configuration
By default, ServiceNow utilizes sys_choice tables to store and display time zone options. Users can select their preferred time zone from a predefined list.
Steps to Add Additional Time Zones in servicenow
If you need to add additional time zones to ServiceNow’s ‘Time Zone’ dropdown, follow these steps:
1. Verify Existing Time Zones
Before making changes, verify the existing time zone options available in the system.
- Navigate to System Definition > Choice List.
- apply the filter as below

check for any existing time zone if exist make sure inactive is set to false , if time zone you are looking for does not exist then create a java supported time zone in the table
2. Adding the time zone to choice list of time zone field
Navigate to Self Service> My Profile .
servicenow
right click on the time zone field and select configure choices and slush bucket will appear
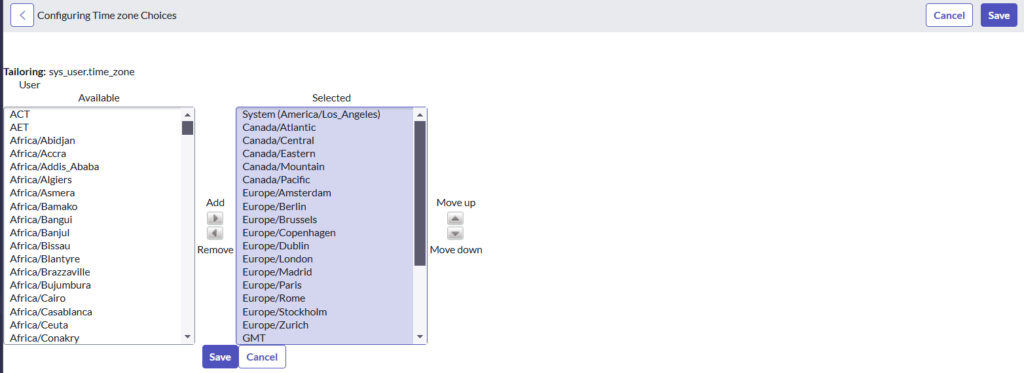
Select the time zone you want users to be able to select from available to selected once done, click on save
2. Validate changes
After making modifications, confirm that the new time zone appears in the selection list:
- Navigate to System Settings > My Profile.
- Check the Time Zone dropdown for the new entry.
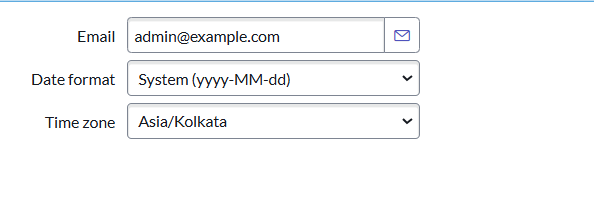
once selected the newly added time zone click on save
Conclusion
Adding additional time zones in ServiceNow enhances user experience and ensures accurate time tracking for global teams. By modifying the sys_choice table and updating user preferences, administrators can provide greater flexibility in time zone selection.
For organizations managing multiple time zones, maintaining an up-to-date list is crucial for accurate scheduling, reporting, and automation workflows.
Please contact us incase you have any inquiry or need help in servicenow
